Hi everybody, hope you’re all doing well.
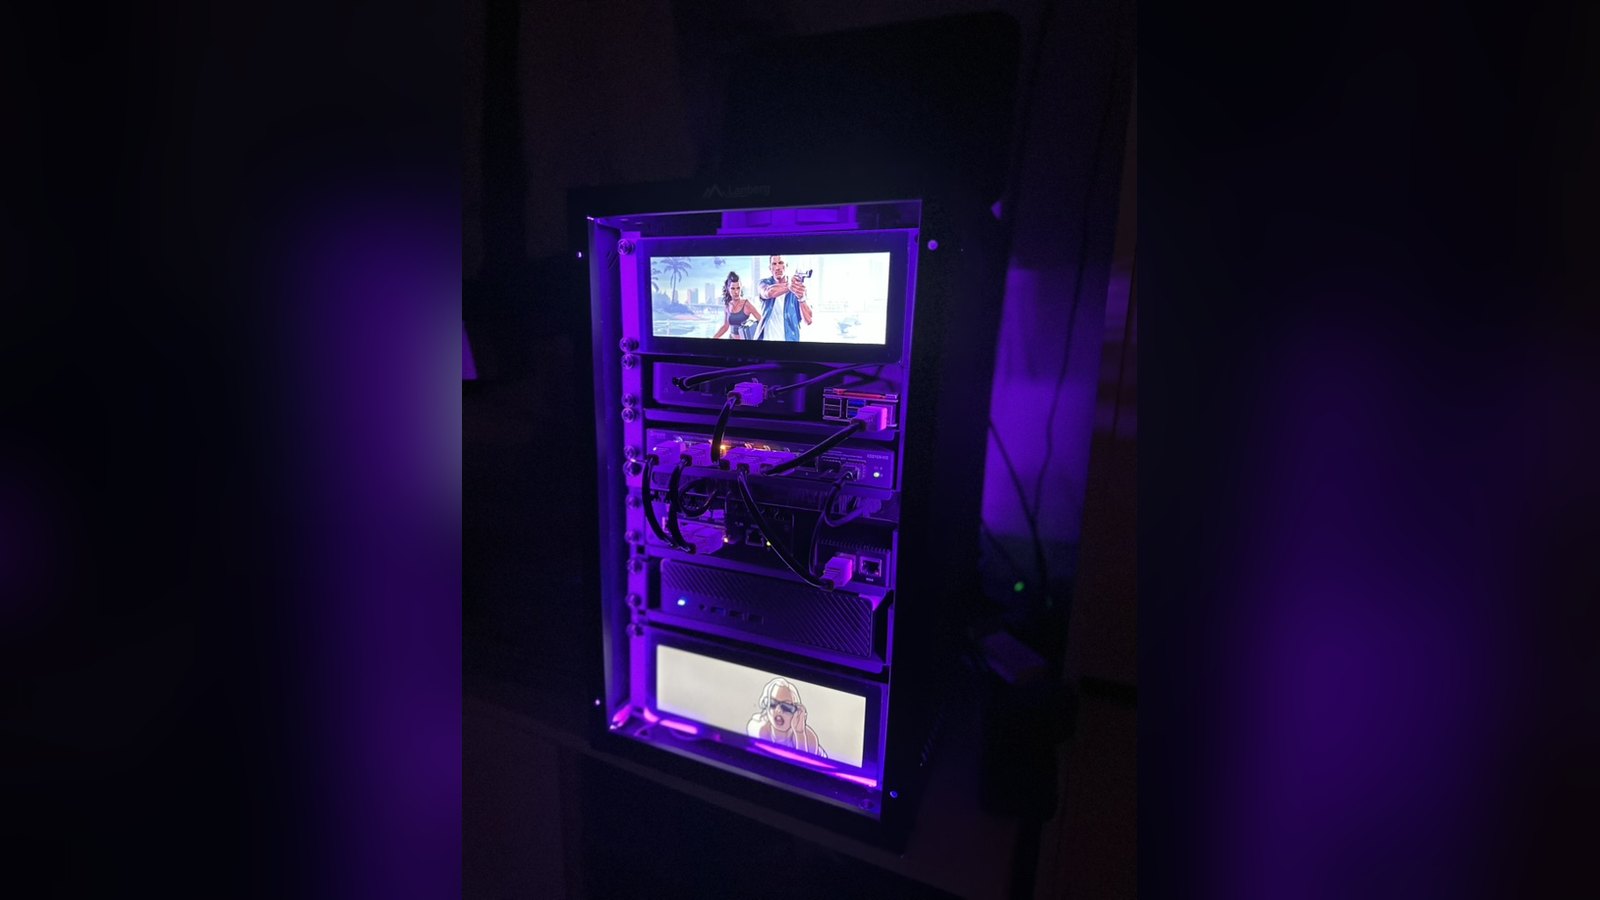
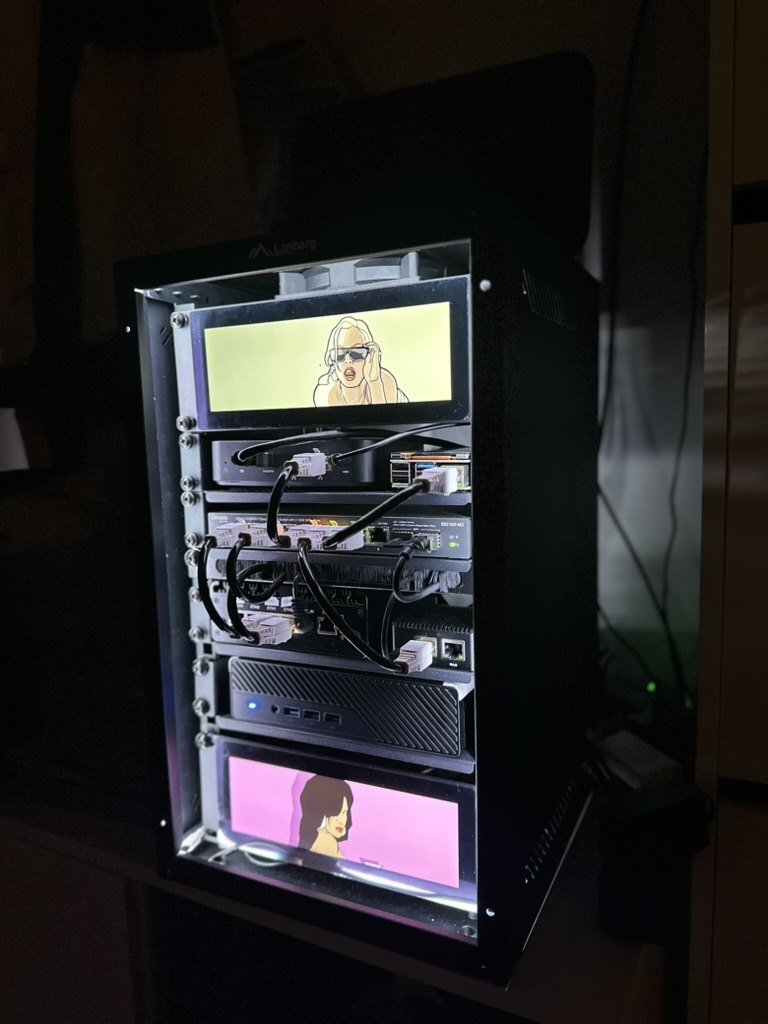
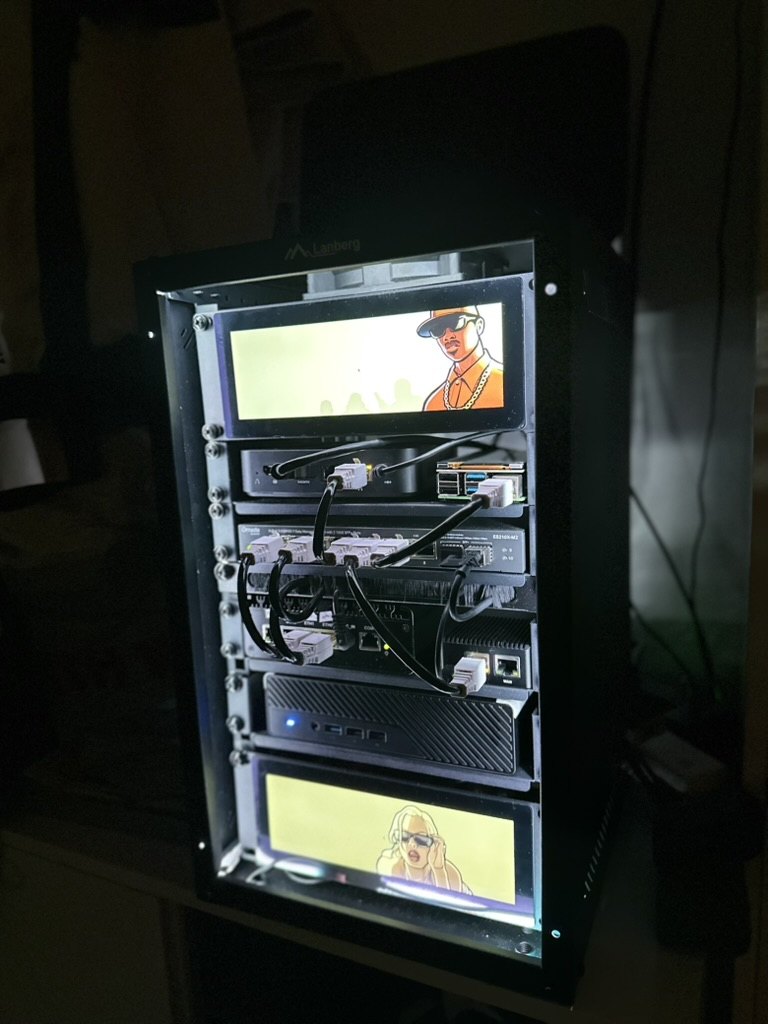
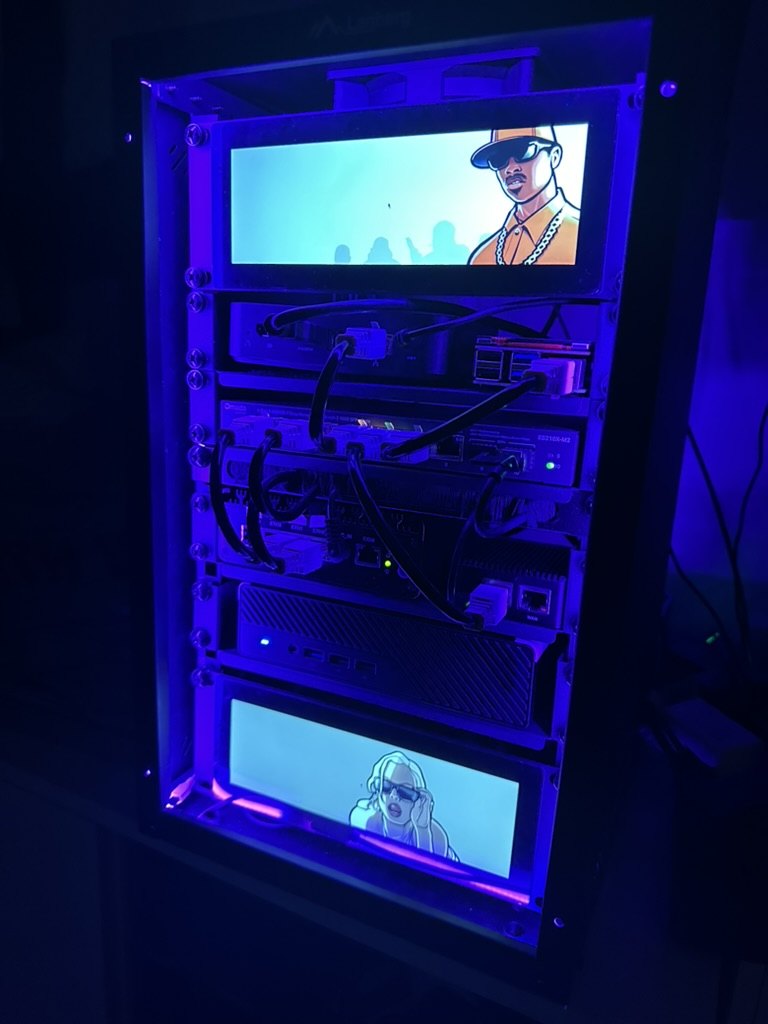
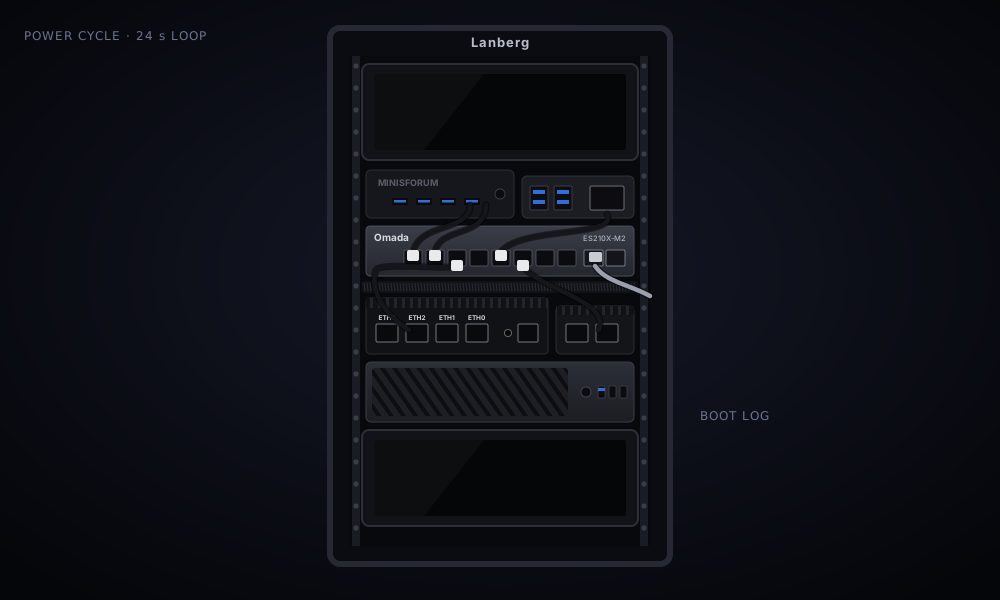
Everything I run at home now lives in one small 10-inch rack: two Proxmox hosts, a firewall, a switch, a tiny backup DNS box, a Raspberry Pi, an LED strip and two little screens showing GTA art. In this post I’ll show you how I built it, what’s inside, how the network is designed, and what it cost.
It took a few evenings, a lot of cable ties and three different attempts at powering the thing. The power part was by far the hardest, so it gets its own chapter. And if you want to learn IT, building something like this is honestly the best way to do it. More on that at the end.
At a glance
- 1 Lanberg 9U 10-inch cabinet
- 2 Proxmox hosts:
pve1does the work,pve2keeps the backups - 1 OPNsense firewall with Suricata, 8 VLANs
- 18 self-hosted services, all behind one reverse proxy with SSO
- 2 screens, 1 RGB strip, 5 power bricks (for now…)
- €2,322 in hardware
Where it started
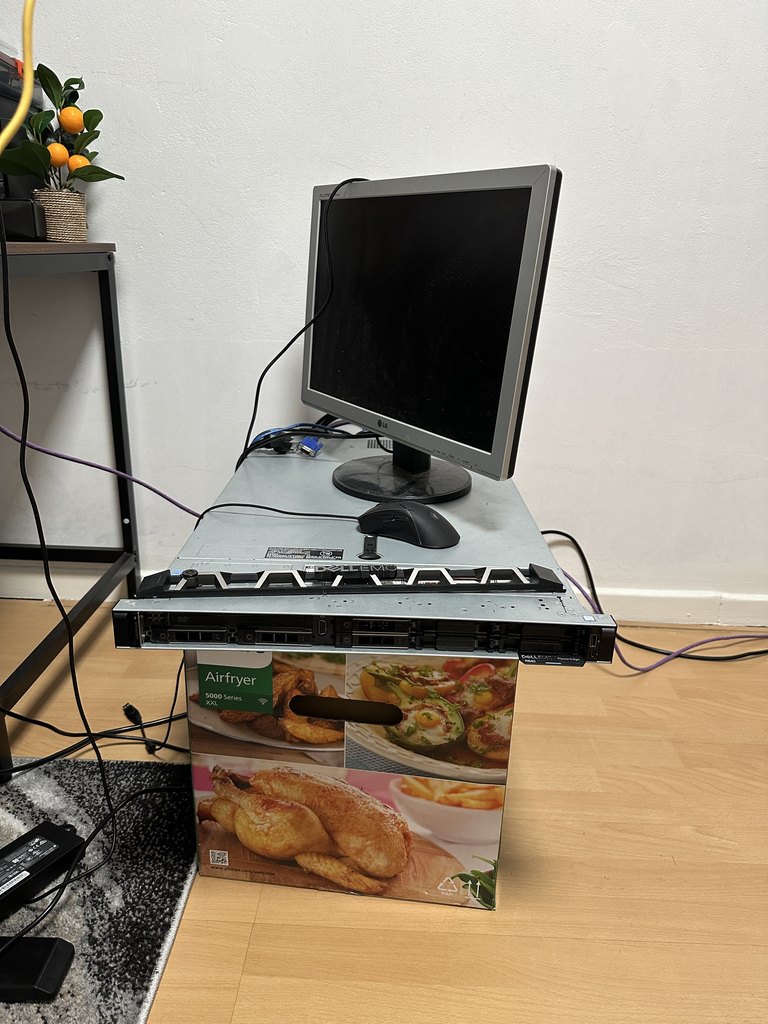
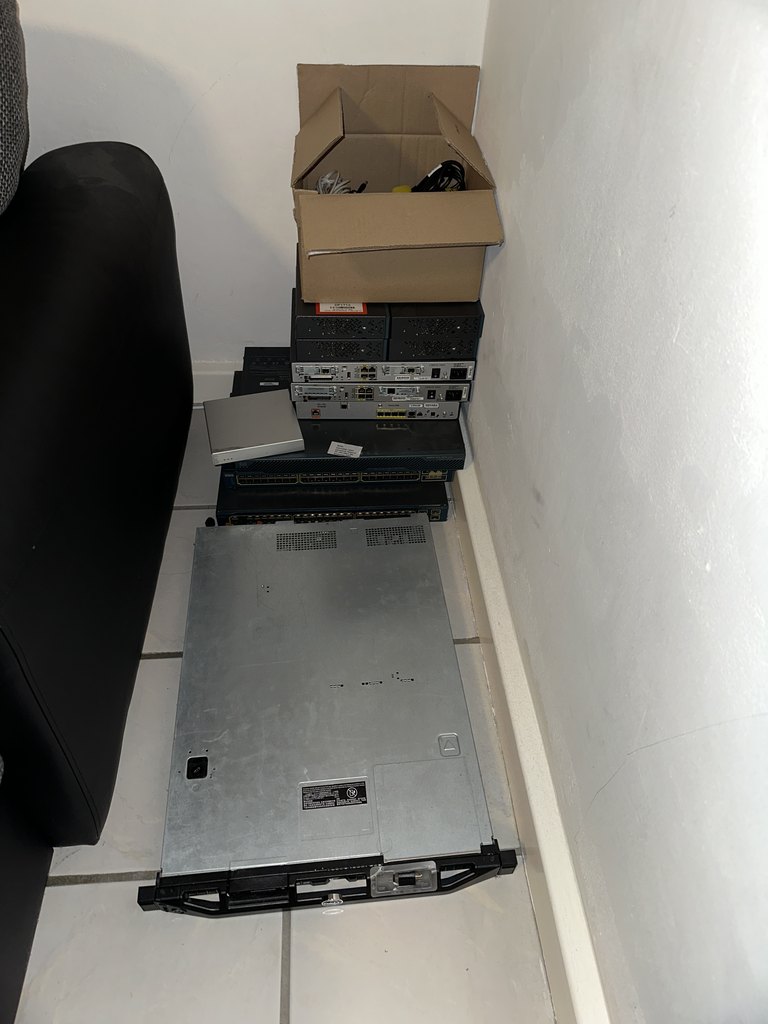
This isn’t my first lab. For a long time my “homelab” was spread around the apartment: a Dell server sitting on a cardboard box, a mini PC on the desk, and a pile of routers, switches and firewalls on the floor.
I bought that network gear a few years ago for hands-on practice. Simulators like EVE-NG, GNS3 or CML are great, but crimping your own cables, wiring a topology and recovering a device you just locked yourself out of teach you things a simulator can’t.
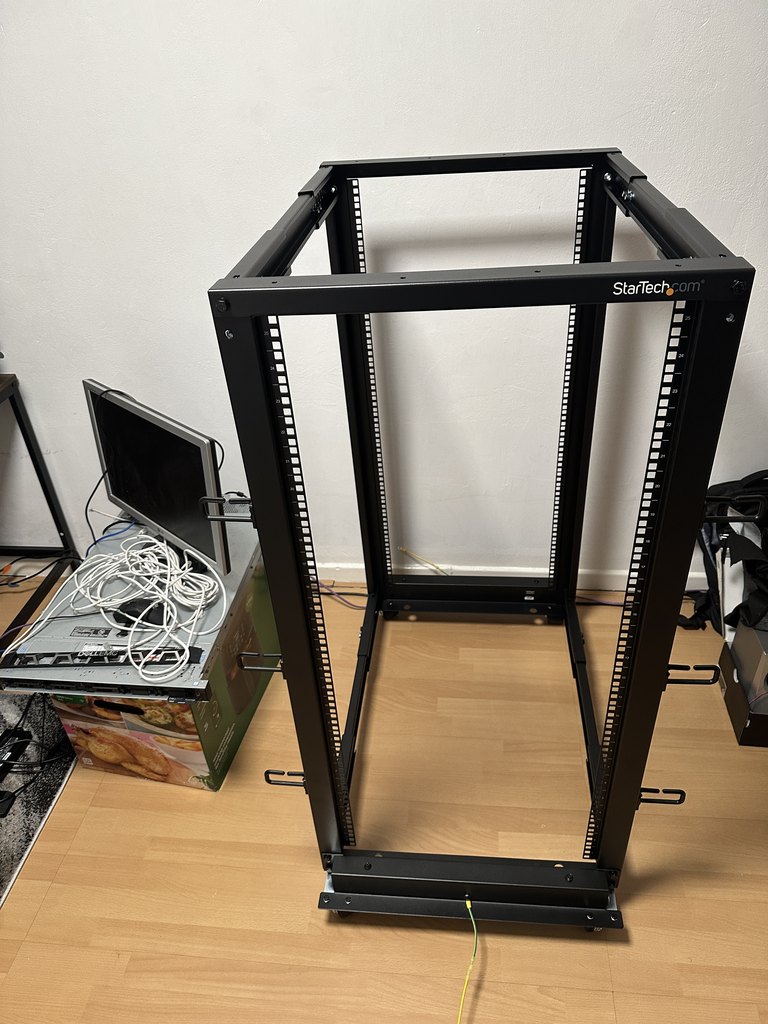
The next step was a 25U StarTech open-frame rack to bring it all together. It ran pfSense, Pi-hole, Bitwarden and a small SOC stack with Wazuh, IRIS, Velociraptor and MISP. It was a great place to learn, but a 25U rack full of rack servers is a lot of metal for an apartment. So this time I went the other way.
Why a 10-inch rack?
Mini PCs are tiny. Put them in a normal 19-inch rack and the rack is mostly air. 10-inch racks are made exactly for this kind of setup: small, cheap, they fit on a shelf, and honestly they just look great.
My rules for this build were simple:
- One box. Everything in the rack, nothing lying around on the floor.
- Quiet and low power. It runs 24/7 in my apartment.
- Properly segmented network. No flat “everything can talk to everything” LAN.
- It has to look good. It sits in my living room, so it has to look nice.
The hardware (and what it cost)
Here’s everything I bought for this build. Prices are in euros.
| Item | What it does | € |
|---|---|---|
| Compute | ||
| Minisforum MS-01, i9-12900H (barebone) | pve1, the main Proxmox host | 540 |
| ↳ WD_BLACK SN7100 1 TB M.2 | fast storage for VMs and containers | 170 |
| ↳ Crucial 1 TB M.2 | Proxmox boot disk | 160 |
| ↳ Crucial 32 GB DDR5-5600 SODIMM | RAM (second-hand, never used) | 240 |
| Minisforum GK41, 8 GB DDR4 | pve2, Proxmox Backup Server | 90 |
| ↳ 128 GB M.2 SSD | system disk | 40 |
| ↳ 320 GB 2.5″ HDD | backup storage | 15 |
| Raspberry Pi 4 (2 GB) | drives the two screens | 70 |
| NanoPi R2S | backup DNS | 80 |
| Network | ||
| Firewall appliance, Intel N100, 4× 2.5 GbE | OPNsense + Suricata | 230 |
| ↳ 256 GB NVMe | system disk | incl. |
| ↳ 16 GB DDR5-4800 | RAM | incl. |
| TP-Link Omada ES210X-M2 | core switch: 8× 2.5G + 2× 10G SFP+ | 120 |
| TP-Link EAP610 | Wi-Fi 6 access point | 83 |
| Ubiquiti 10G DAC, 0.5 m | MS-01 ↔ switch | 15 |
| 20 m CAT7 cable | every patch cable, made to length | 16 |
| 50× tool-less RJ45 plugs | no crimping tool needed | 40 |
| Rack & looks | ||
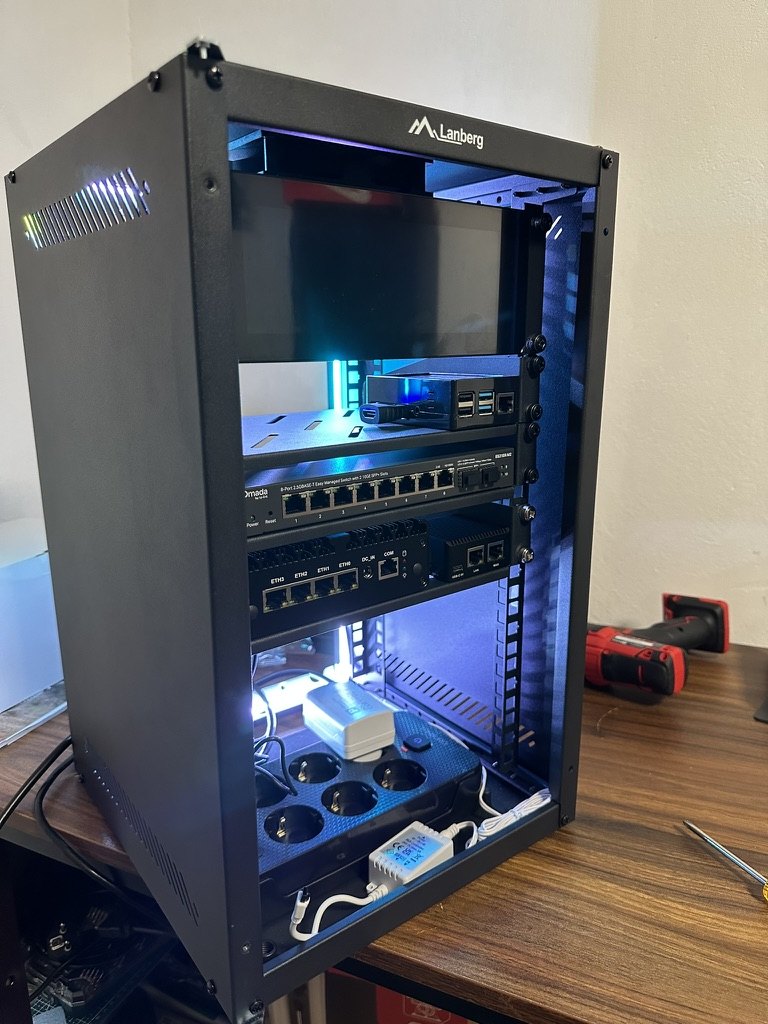
| Lanberg WF10-2309-10B, 9U 10″ | the rack itself | 52 |
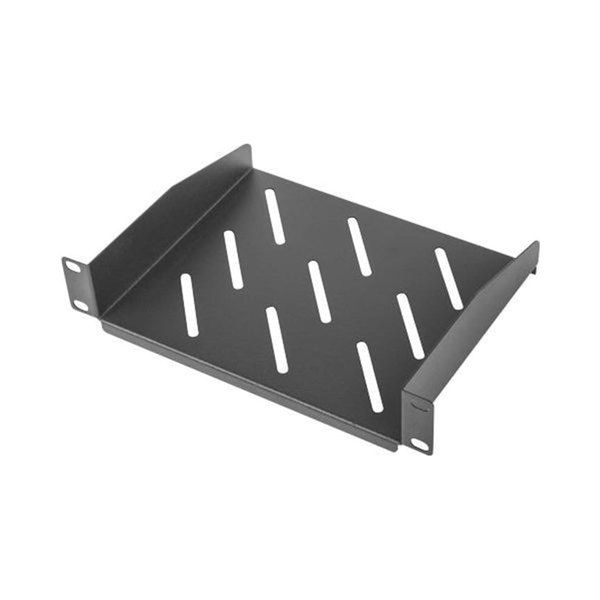
| 4× Lanberg AK-1012-B shelves | the mini PCs sit on these | 45 |
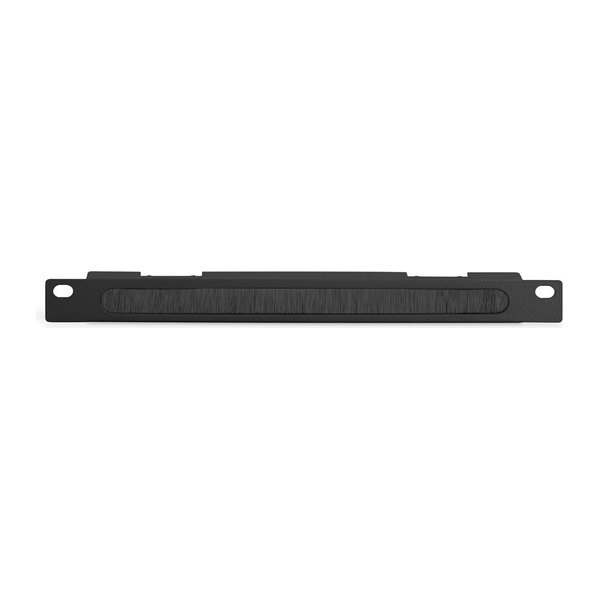
| Digitus cable management brush strip | hides the cables under the switch | 10 |
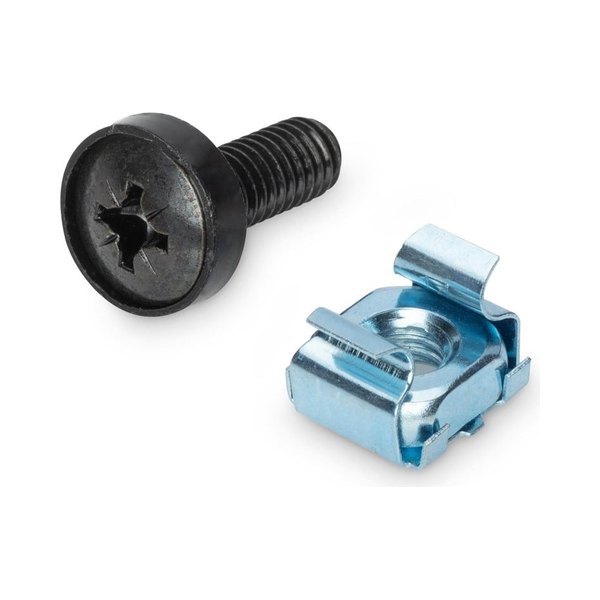
| Digitus DN-19 SET, M6 screws | cage nuts and screws | 9 |
| 2× GeeekPi 7.84″ 1280×400 touch screen | the two screens | 200 |
| 2× HDMI cable | for the screens | 16 |
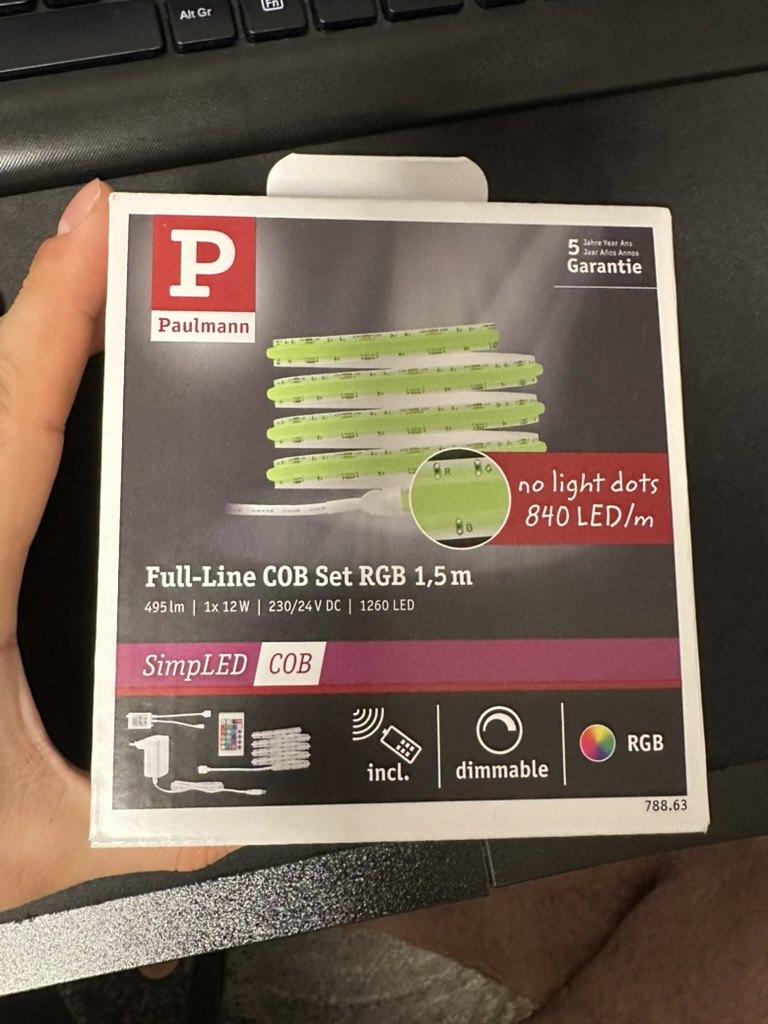
| Paulmann Full-Line COB RGB, 1.5 m | the LED strip | 30 |
| USB fan | exhaust at the top | 15 |
| 64 GB USB stick | installer stick | 6 |
| Power | ||
| Sonoff S60TPF Wi-Fi smart plug | smart plug with power metering | 17 |
| 6-way strip with USB-C | attempt #1, retired | 13 |
| Total | 2,322 |
Build log
Evening one: the rack, shelves, switch and firewall
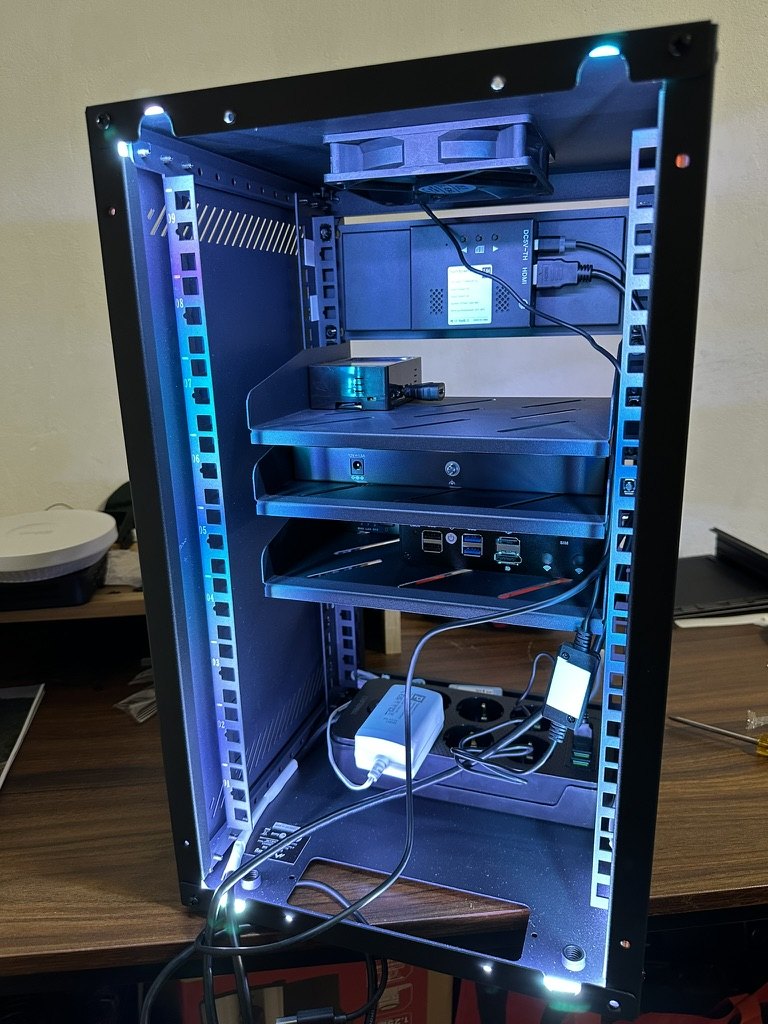
The rack arrives flat-packed and goes together in about half an hour. The real work is planning which device goes where. I wanted the switch in the middle, so every patch cable stays short, and the screens at the very top and bottom, like a frame.
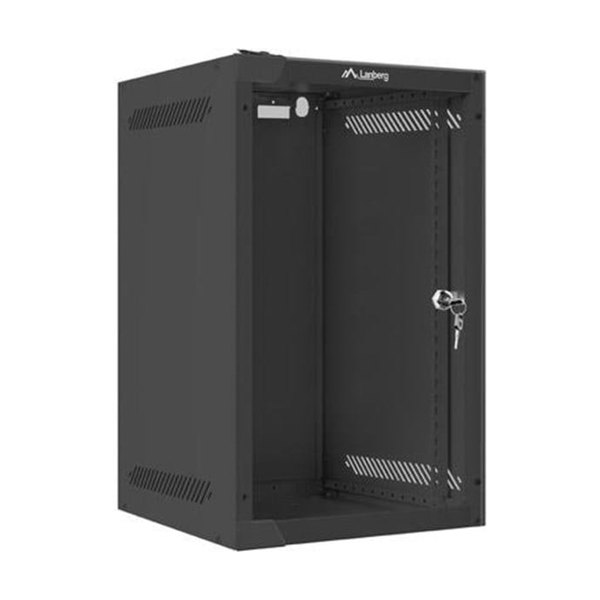
These are the parts that hold everything together. If you’ve never seen a 10-inch rack up close, this is basically all there is to it:
Upgrades on the way in
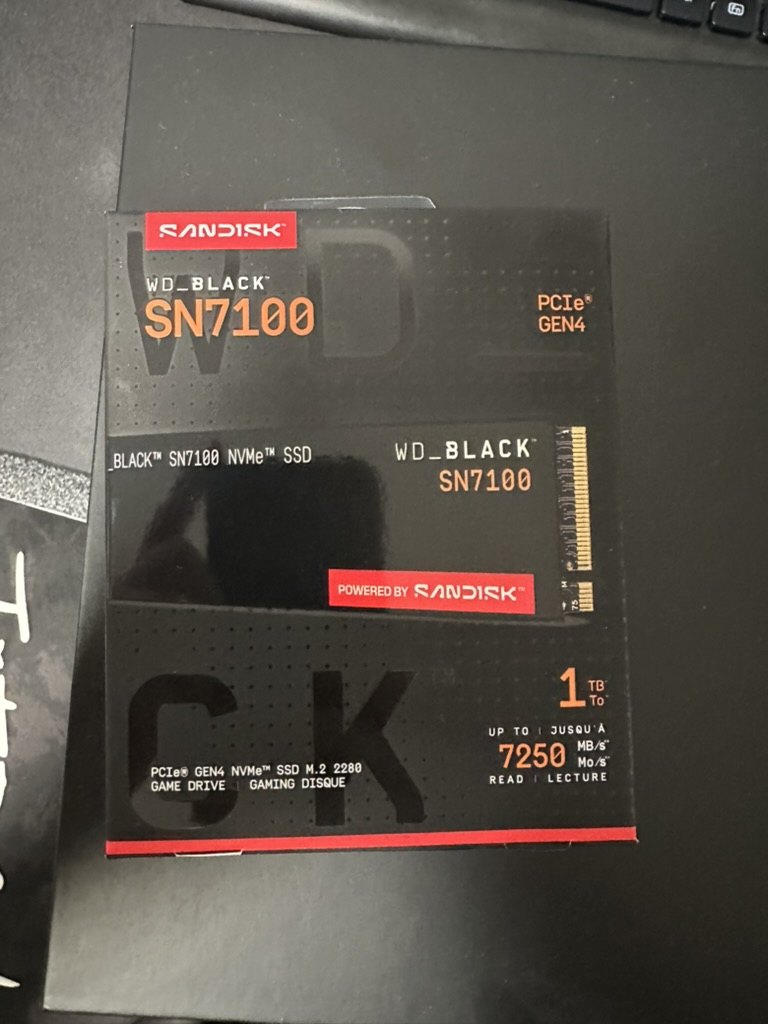
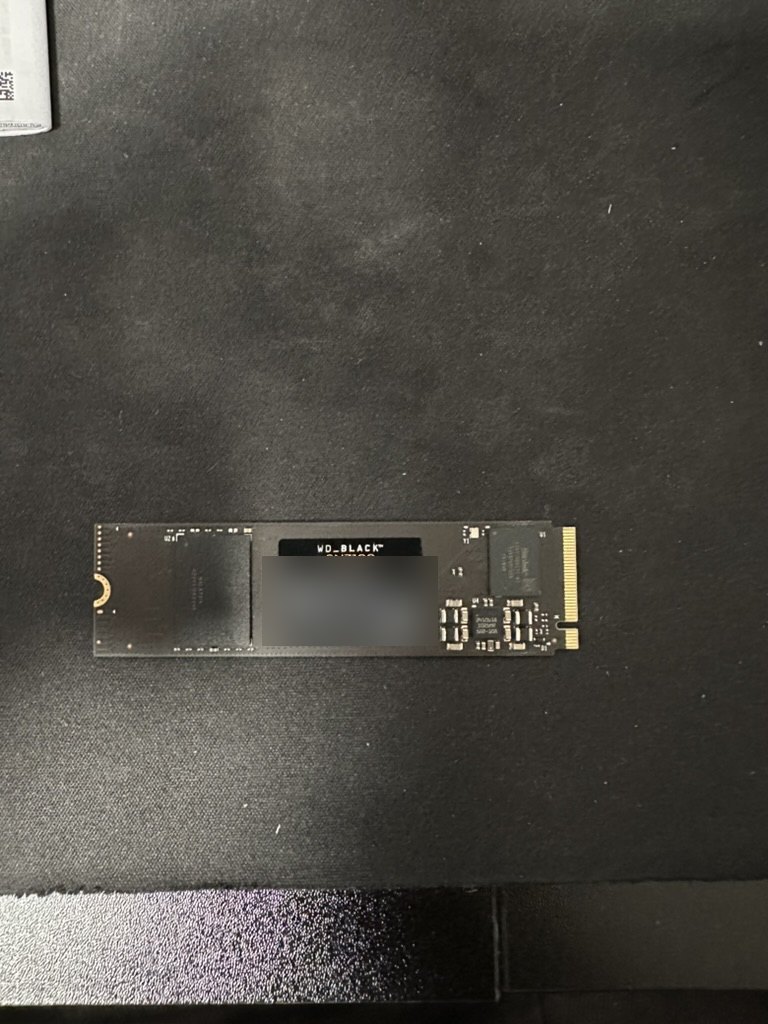
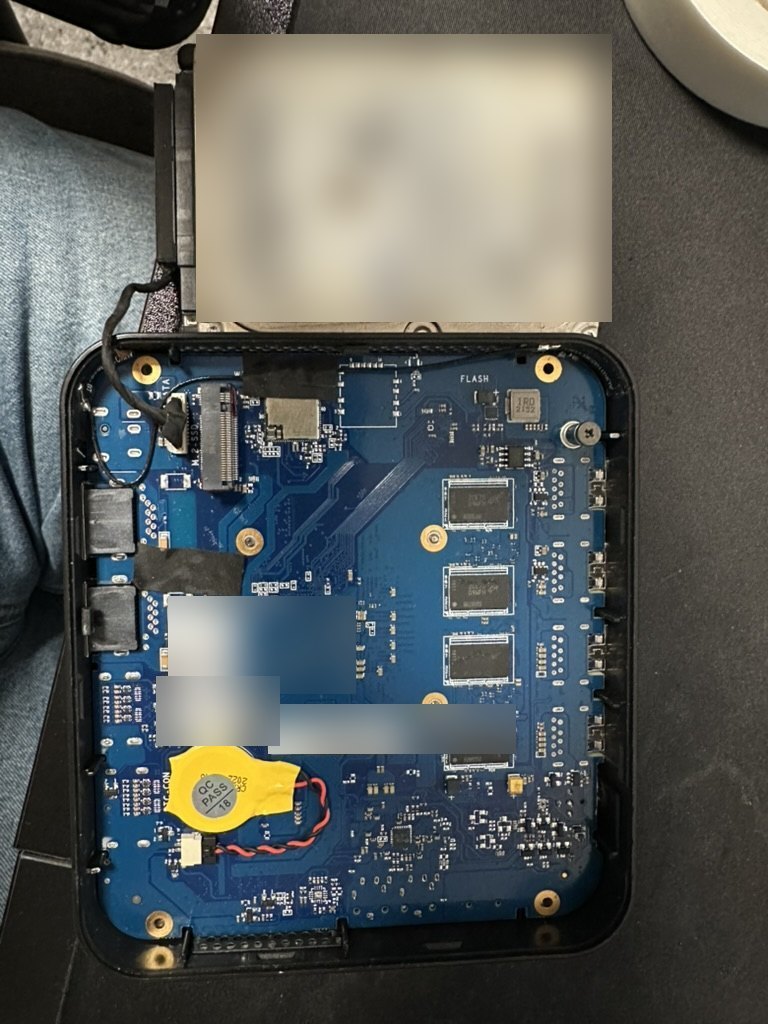
Before anything went into the rack, every box got opened up. The MS-01 got its 32 GB stick and two 1 TB NVMe drives. The GK41 got a 128 GB M.2 SSD and a 320 GB 2.5″ drive. And I bought an RGB strip, because a homelab without RGB is just a server closet.
The main characters
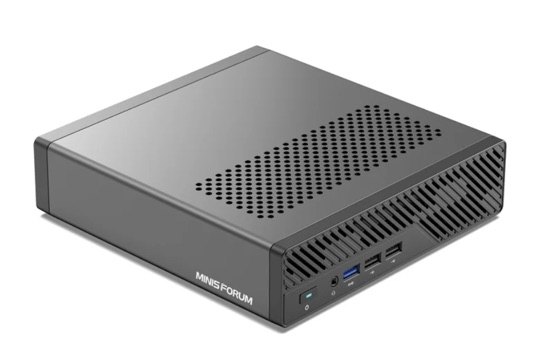
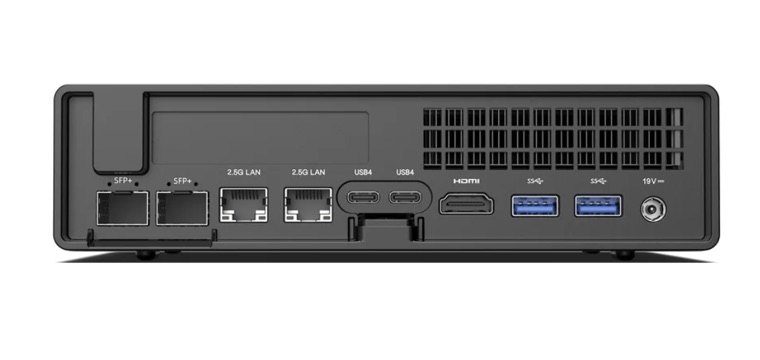

- Minisforum MS-01: an i9-12900H (14 cores, 20 threads) in a box smaller than a book, with two 10G SFP+ ports, two 2.5G ports and three M.2 slots. Two of them hold 1 TB drives: a Crucial for Proxmox itself and a WD_BLACK SN7100 for the VMs. It’s the heart of the lab, and it barely notices the load: around 4% CPU with everything running.
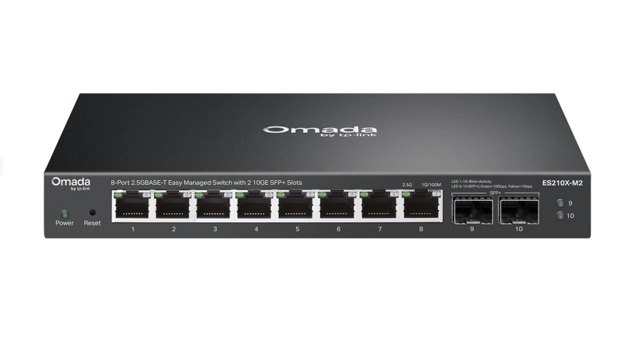
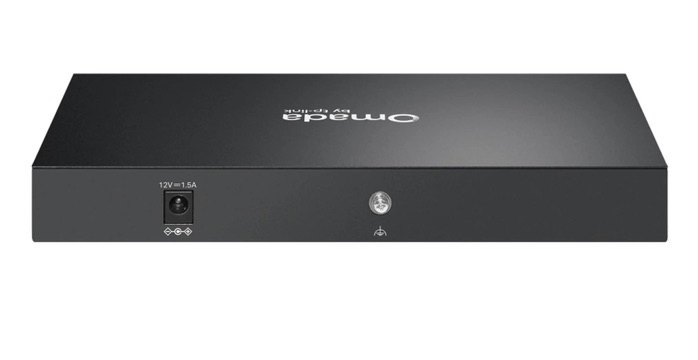
- Omada ES210X-M2: eight 2.5G ports plus two 10G SFP+ cages, with proper VLAN support, at a price that doesn’t hurt. It fits the 10-inch rack perfectly.
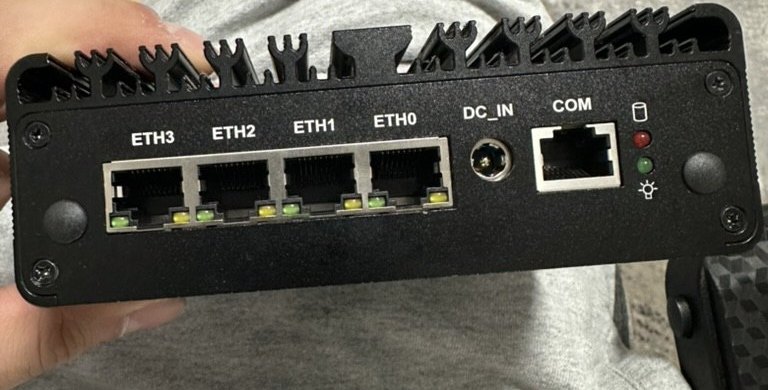
- N100 firewall: fanless, four Intel 2.5 GbE ports, 16 GB DDR5 and a 256 GB NVMe. OPNsense and Suricata run on it with plenty of room to spare.
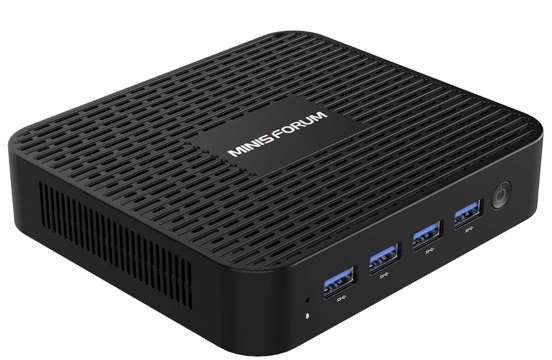
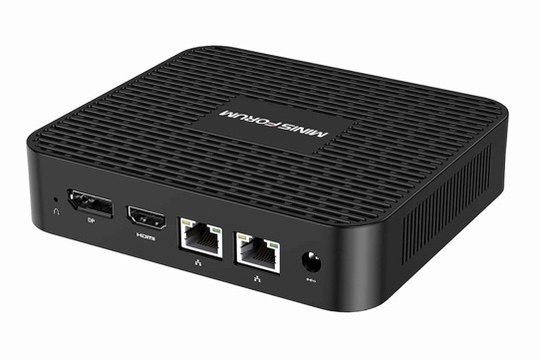
- Minisforum GK41: old, slow, and perfect for one job, keeping backups. It boots from a 128 GB M.2 SSD and stores backups on a 320 GB 2.5″ drive.
- TP-Link EAP610: Wi-Fi 6, and one SSID per VLAN, so phones, IoT and guests each land in their own network.
- NanoPi R2S: a tiny dual-port box that runs my backup DNS. If the main DNS is down, the house keeps working.
- Raspberry Pi 4: drives the two screens.
The power problem
This was the part I underestimated the most.
My plan was simple: one cable comes out of the rack, and that’s it. Everything else, every adapter and every strip, hides inside. One box, plug it in, done.
Then I counted what actually needs power. The MS-01 wants 19 V. The GK41, the firewall and the switch each want 12 V, but with different plugs and currents. The LED strip wants 24 V. On top of that, the small boards, the screens and the fan want 5 V over USB or Type-C. That’s five power bricks plus a bunch of USB devices for one small rack.
Attempt #1: a 6-way strip at the bottom
The first idea was to put a 6-way strip (with USB-C, nice!) on the bottom shelf and stack all the adapters on top of it.
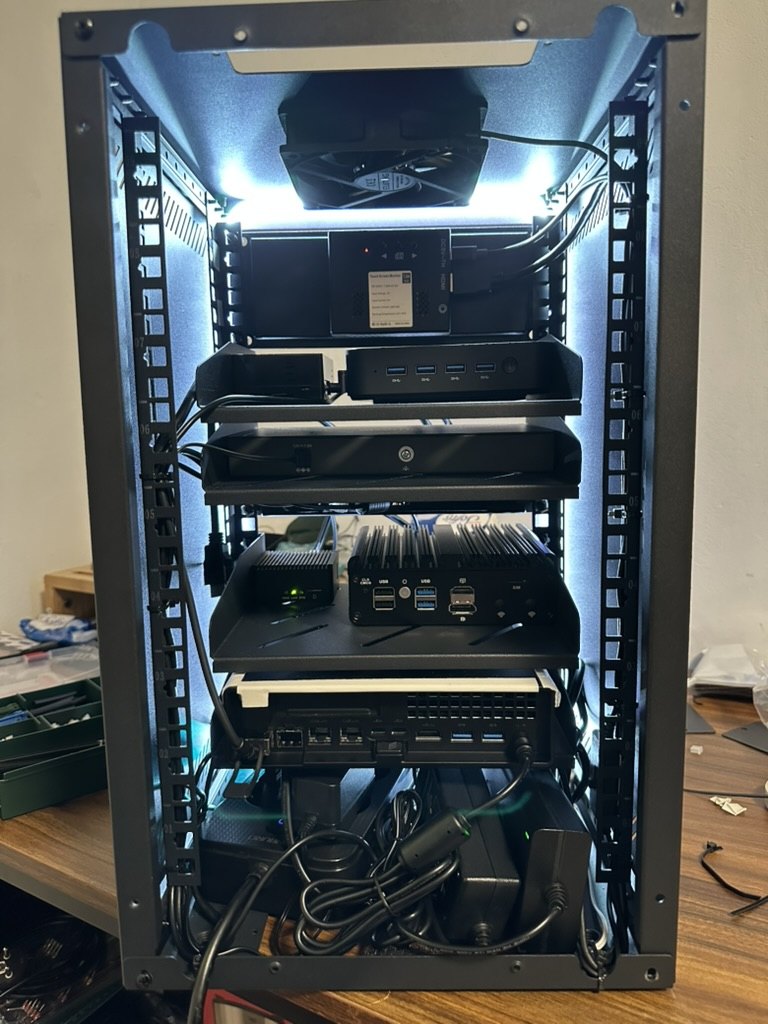
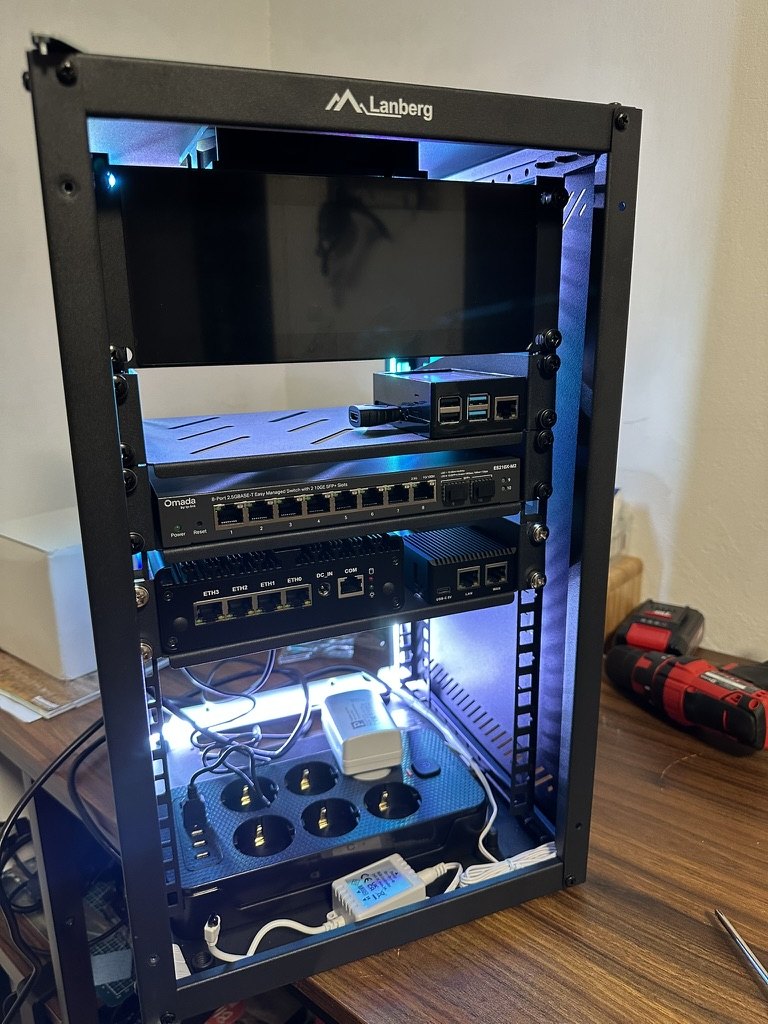
It worked, technically. But the bottom of the rack turned into a bird’s nest, and the strip itself felt cheap. It’s not something I wanted to run 24/7 inside a closed box full of electronics. Cancelled.
Attempt #2: a proper 10″ rack PDU
Next try: proper rack PDUs. Four sockets aren’t enough for everything, so I used two Digitus 1U 10-inch PDUs: one at the very bottom of the front, one at the very top of the back.
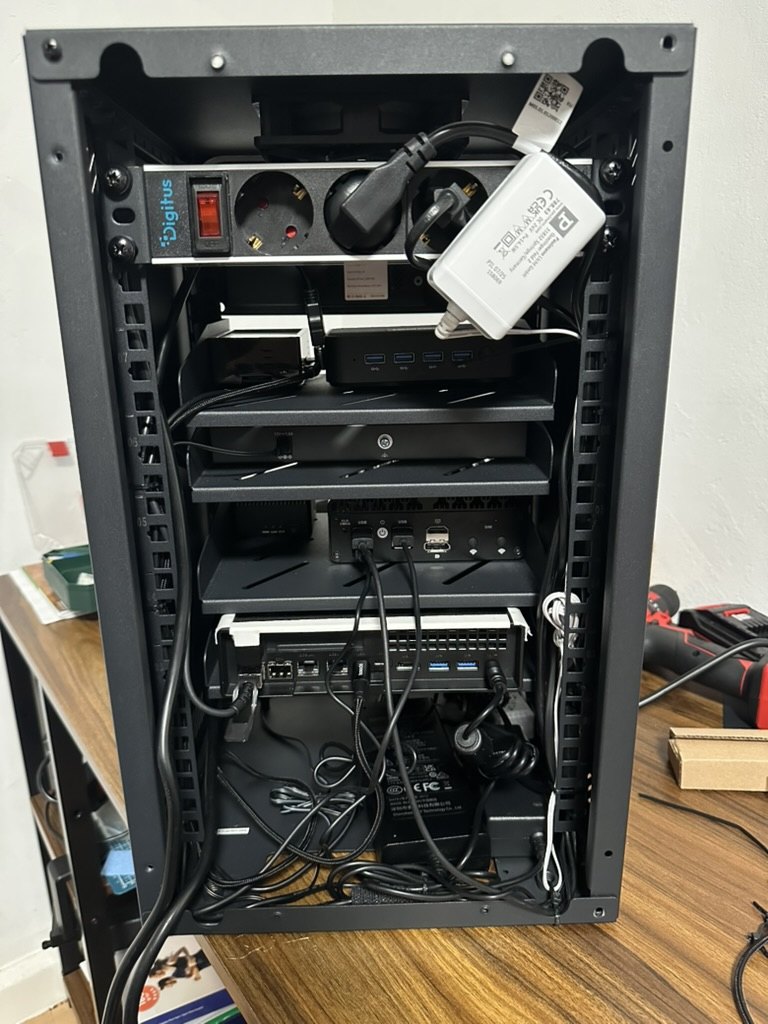
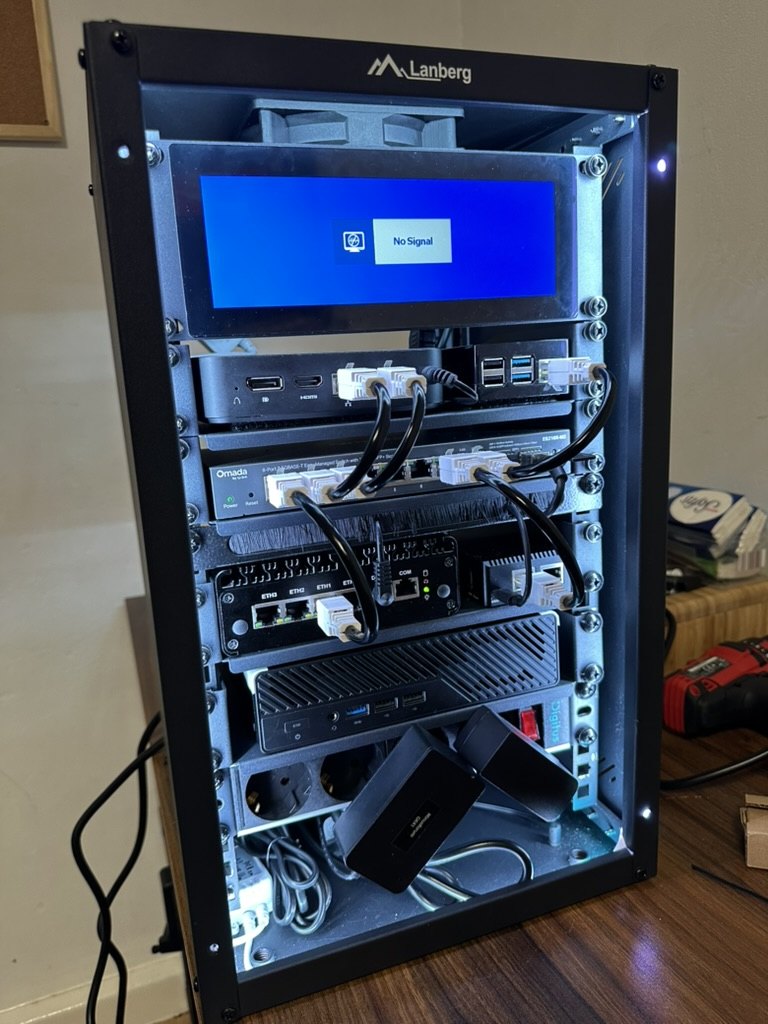
Much better quality, but two PDUs meant even more cables, and they blocked access to the devices. Every time I wanted to change something I’d have to take half the rack apart again. So my “one cable out” idea had a hidden price: the rack gets harder to work on every time you touch it.
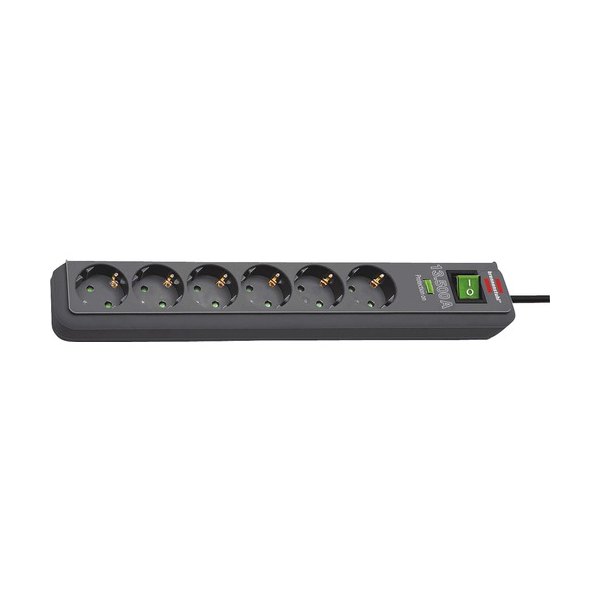
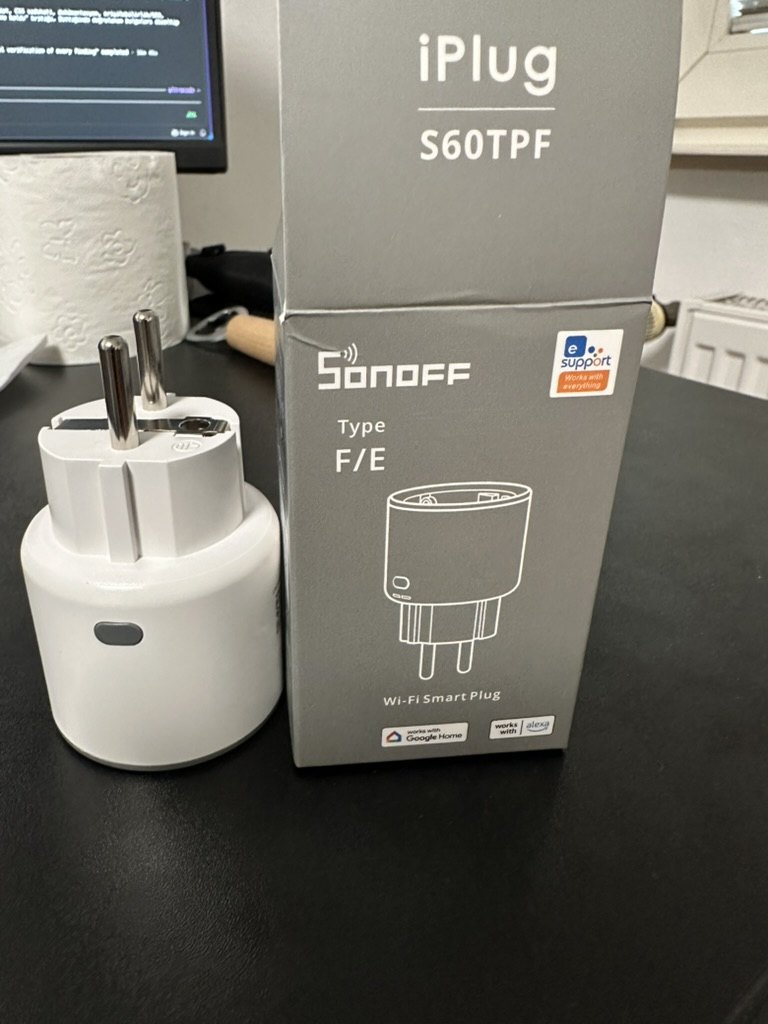
Cancelled too. For now, the five bricks plug into a Brennenstuhl Eco-Line 6-way strip with surge protection behind the rack. Everything that runs on USB or Type-C (the Pi, the NanoPi, the screens and the fan) is powered from the USB ports of the other devices. That saves adapters, but those devices go down whenever their host does, which is one more reason for the plan below. It’s not pretty, but every device is easy to reach. A Sonoff S60TPF smart plug sits in front of the strip and measures how much power the whole rack draws.
The plan: a custom DC-PDU
Here’s where I’m heading. Almost everything in the rack runs on low-voltage DC anyway, so why have a separate brick for every box, and USB devices hanging off whatever host is nearby? I’m looking into a custom-made 1U, 10-inch DC power unit: one 230 V input, and every rail I need comes out the back.
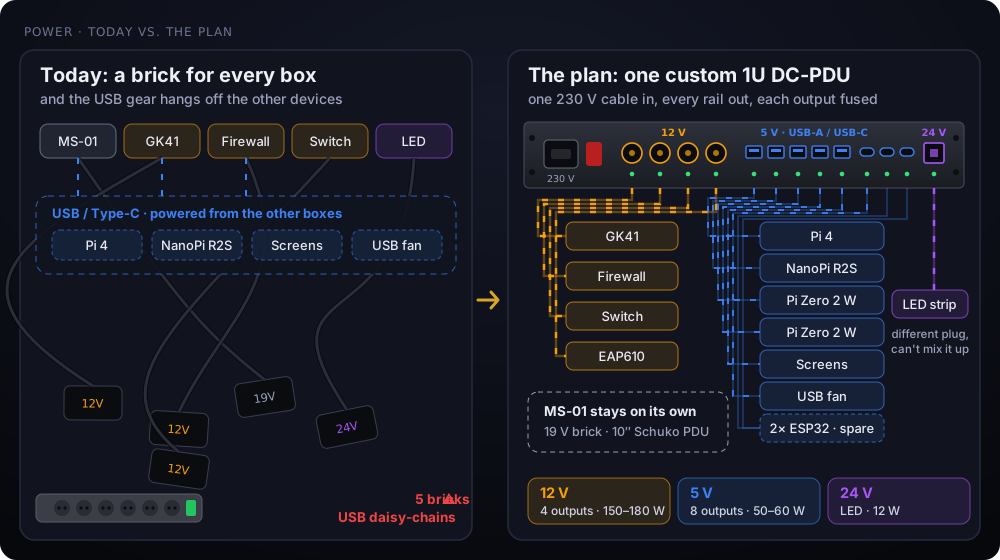
What I’m asking for:
| Rail | Feeds | Outputs | Budget |
|---|---|---|---|
| 12 V | GK41, firewall, switch, EAP610 | 4, locking connectors | ~112 W max → 150–180 W with headroom |
| 5 V | NanoPi R2S, Raspberry Pis, screens, USB fan, 2 spare for ESP32s | 8, roughly 5× USB-A + 3× USB-C | 50–60 W |
| 24 V | Paulmann LED strip | 1, a different connector so it can never go into a 12 V device | 12 W |
| 19 V | MS-01 | stays on its own adapter, plus a small 10″ Schuko PDU | – |
And the requirements that actually matter:
- Every output fused on its own. A short on one device must not take down the others.
- No brownouts on USB. Plugging something in must not reboot the board next to it.
- 24/7 rated, with short-circuit, over-current, over-voltage and over-temperature protection, and fanless if possible.
- Max 1U, mounted at the back.
Is a one-off custom power supply expensive? Yes. Is it worth it for a rack that’s going to run for years and look clean? I think so. If a fully integrated 230 V unit doesn’t make sense, the fallback is a certified external AC/DC supply plus a pure DC distribution panel. I’ll write a follow-up when it’s built.
Network design
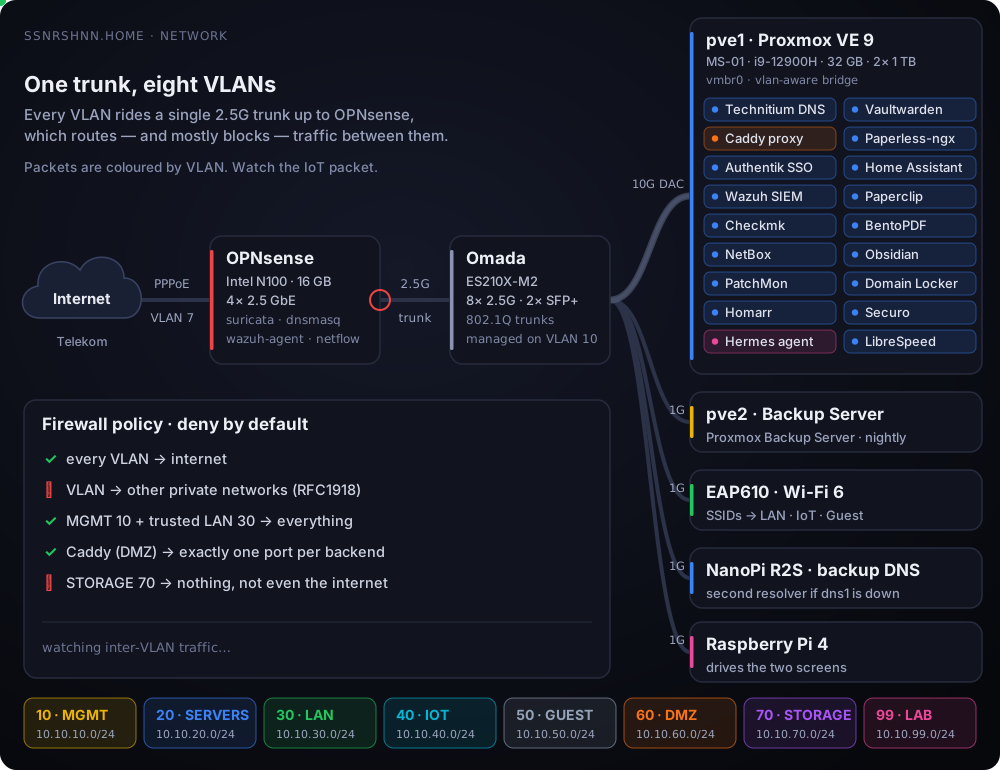
This is the part I enjoyed the most. Here’s the whole thing in one picture:
Router-on-a-stick
OPNsense handles the internet connection itself. Telekom wants PPPoE on VLAN 7, and the firewall dials it directly, so there’s no double NAT and no ISP box doing any routing.
On the inside, one 2.5G trunk carries every VLAN to the switch. OPNsense routes between them, and mostly says no. The MS-01 hangs off the switch with a single 10G DAC into an SFP+ cage. Proxmox runs a VLAN-aware bridge, so every container just gets a tag and lands in the right network.
Two of the firewall’s ports are left over. One is free for later. The other is an out-of-band management port on its own little subnet. If I ever lock myself out with a bad rule, I plug a laptop in there and I’m back in.
Eight VLANs
| VLAN | Name | Subnet | What lives there |
|---|---|---|---|
| 10 | MGMT | 10.10.10.0/24 | firewall, switch, access point, both Proxmox hosts |
| 20 | SERVERS | 10.10.20.0/24 | every service container and VM |
| 30 | LAN | 10.10.30.0/24 | my laptop and phone: trusted clients |
| 40 | IOT | 10.10.40.0/24 | smart home devices |
| 50 | GUEST | 10.10.50.0/24 | guests |
| 60 | DMZ | 10.10.60.0/24 | the Caddy reverse proxy, the only door to the services |
| 70 | STORAGE | 10.10.70.0/24 | reserved for the NAS: no traffic in or out, not even internet |
| 99 | LAB | 10.10.99.0/24 | experiments and AI agents |
Firewall: deny by default
Every VLAN follows the same simple pattern: it may ask the DNS server, it may go to the internet, and it may not talk to any other private network. Exceptions are single, named pinholes. For example, the proxy may reach Vaultwarden on port 8000, and that’s all it may do there. Only the management VLAN and my own trusted LAN can reach everything else.
On top of that, Suricata runs on OPNsense as IDS/IPS, so suspicious traffic gets flagged and dropped right at the edge. The Wazuh agent on the firewall ships the logs to my SIEM.
Service isolation and microsegmentation
VLANs separate different parts of my network, but there’s one more thing to consider: most of my services live in the same SERVERS subnet.
Traffic between them doesn’t need to pass through OPNsense, which means the VLAN firewall rules alone aren’t enough to keep individual services isolated.
That’s where Proxmox comes in. I use per-VM and per-LXC firewall rules to control which services can communicate with each other. Each service only gets access to what it actually needs, rather than being able to reach everything else on the same network.
This adds another layer of protection and helps limit lateral movement if a service gets compromised.
No need for a separate VLAN for every application. Just tighter control over who can talk to whom.
DNS, the proxy and certificates
- Technitium DNS is the main DNS server, and DHCP hands it out to all the client VLANs. The NanoPi R2S runs a second DNS as backup.
- Every service name (
*.ssnrshnn.home) points to one IP: Caddy in the DMZ. - Caddy terminates TLS with its own internal CA (
tls internal), so every service gets a valid HTTPS certificate on my devices, and it forwards each request to the right backend. - Authentik sits in front of the apps as SSO, so it’s one login instead of eighteen.
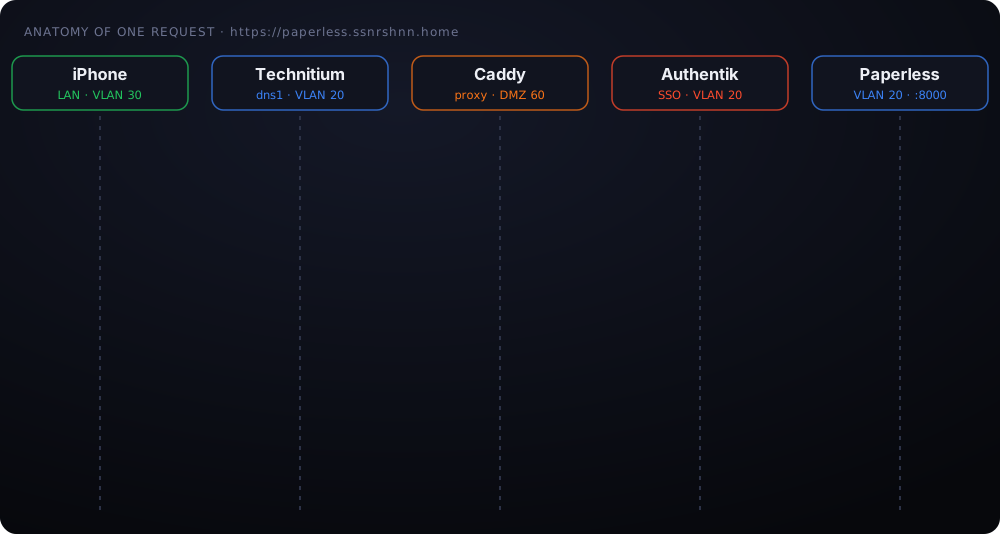
Here’s what happens when I open Paperless from my phone. Before Caddy lets the request through, it asks Authentik who I am. If I’m already logged in anywhere in the lab, that’s a single round-trip. If not, I log in once and every other app just works:
What runs on it
pve1 runs 16 LXC containers and 2 VMs. With everything running it uses about 4% CPU and 17 of 31 GB RAM, and the NVMe for VMs is only 15% full. That leaves plenty of room for the next ideas.
| Service | What I use it for | Where |
|---|---|---|
| Infrastructure | ||
| Technitium DNS | main DNS for the whole network | LXC · SERVERS |
| Caddy | reverse proxy + internal TLS | LXC · DMZ |
| Authentik | single sign-on for the apps | LXC · SERVERS |
| Homarr | dashboard for everything | LXC · SERVERS |
| Security & monitoring | ||
| Wazuh | SIEM, with agents everywhere, including OPNsense | LXC · SERVERS |
| Checkmk | monitoring: hosts, SNMP, services | LXC · SERVERS |
| PatchMon | which box needs updates | LXC · SERVERS |
| NetBox | IPAM / DCIM: the source of truth for IPs and cables | LXC · SERVERS |
| Domain Locker | domain and certificate expiry tracking | LXC · SERVERS |
| Daily apps | ||
| Vaultwarden | password manager | LXC · SERVERS |
| Paperless-ngx | every paper document, scanned and searchable | LXC · SERVERS |
| BentoPDF | PDF toolbox | LXC · SERVERS |
| Obsidian | notes in the browser | LXC · SERVERS |
| Securo | personal finance | LXC · SERVERS |
| LibreSpeed | speed test inside my own network | LXC · SERVERS |
| Home Assistant | smart home | VM · SERVERS |
| AI & lab | ||
| Paperclip | AI agent orchestration | VM · SERVERS |
| Hermes Agent | self-hosted AI agent | LXC · LAB |
pve2, the little GK41, runs Proxmox Backup Server: every guest on pve1 gets backed up there every night, deduplicated and verified. The NanoPi R2S next to the firewall is the backup DNS.
One page to see it all
Everything comes together in Homarr, my dashboard. One page, and I know whether something is wrong before I finish my first coffee:
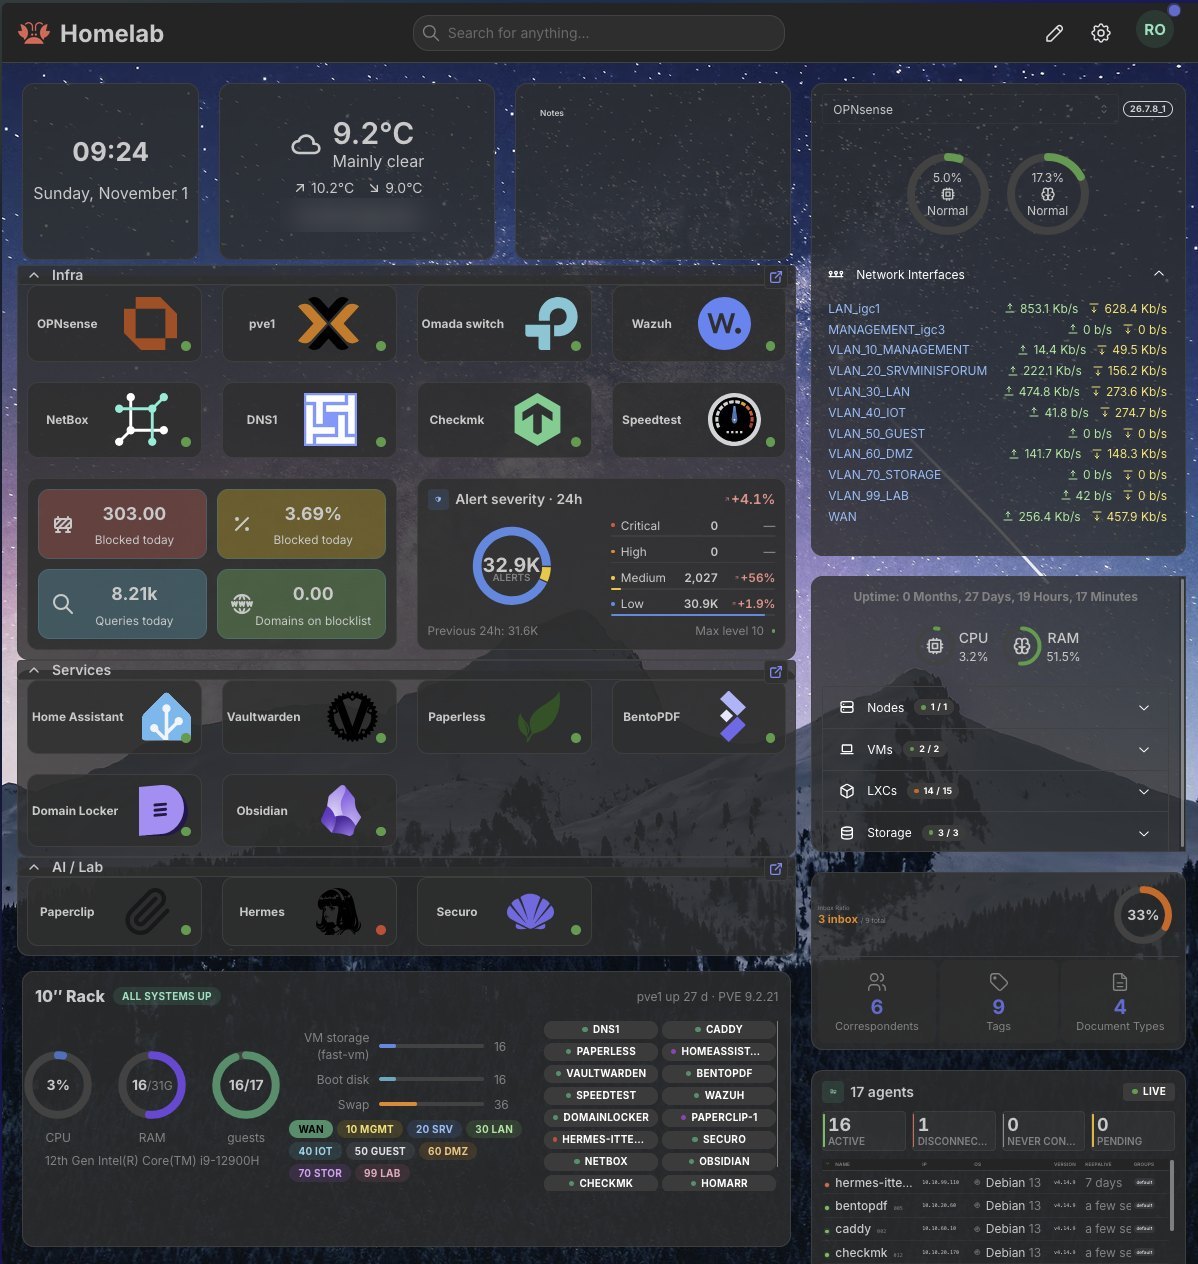
- OPNsense: firewall CPU and RAM, plus live traffic for every VLAN.
- Proxmox: the node, VMs, containers and storage at a glance.
- Technitium DNS: queries and blocked domains today.
- Wazuh: alerts by severity over the last 24 hours, and every agent with its status.
- Paperless: inbox, correspondents, tags and document types.
- The “10″ Rack” widget: a custom widget I built for this rack with Homarr’s custom widget feature. It reads the Proxmox and OPNsense APIs directly and shows CPU, RAM and running guests on
pve1, storage, WAN plus all eight VLANs, and every guest with its status.
The screens
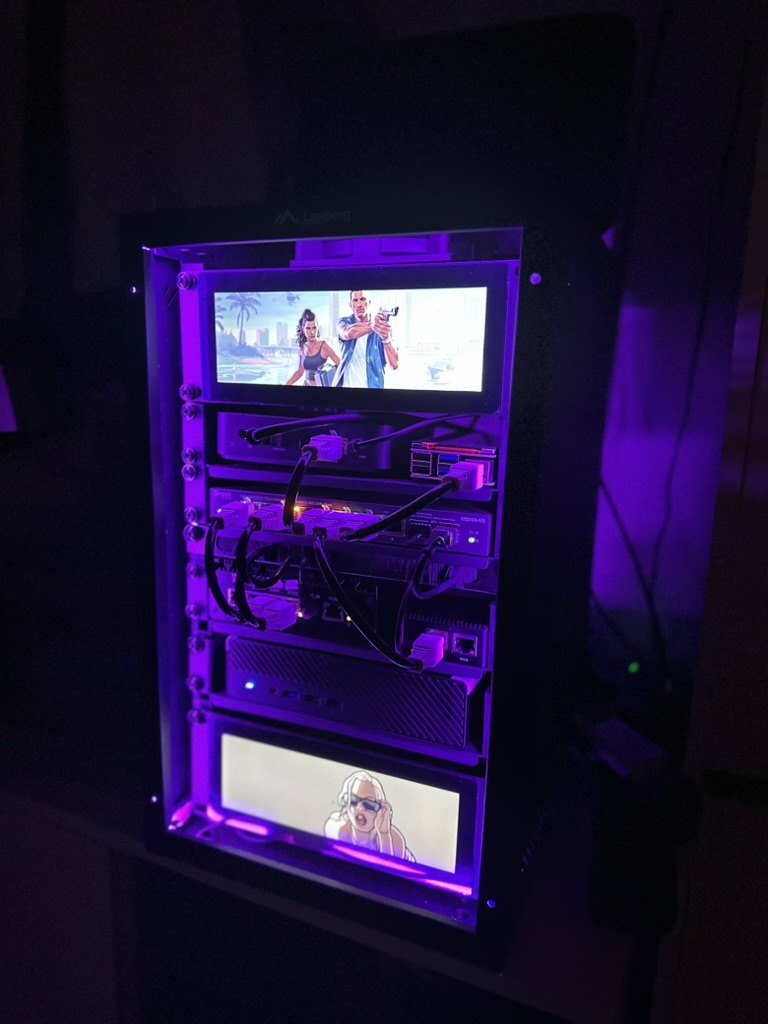
The two 7.84″ GeeekPi screens (1280×400) at the top and bottom were an impulse buy, and they’re my favourite part. Right now they show GTA art, top and bottom, because why not.
The best way to learn
If you want to learn infrastructure, networking or security, I honestly don’t know a better way than building your own homelab. Courses and labs teach you one topic at a time. A homelab hands you the whole thing at once, the same chain a real IT team deals with every day, just smaller. And nobody judges you when you break it.
If you build one yourself, these are the topics you’ll run into, step by step, and every one of them is something you’ll actually learn by doing:
| Step | What you’ll learn | Where you can see it in this build |
|---|---|---|
| Planning & needs | what you really need vs. what looks cool; space, noise, power and budget as hard limits | 10-inch rack, mini PCs, 24/7 in a living room |
| Inventory & documentation | knowing every device, port, IP and cable, and writing it down before you forget | NetBox as the source of truth, the price list above |
| Purchasing | comparing specs, new vs. second-hand, and the hidden costs nobody mentions | RAM prices, shelves, screws, DAC cables, plugs |
| Rack planning & order | airflow, cable lengths, labelling, and keeping everything reachable for maintenance | the brush strip, short patch cables, the power saga |
| Network design | subnets, VLANs, trunks, routing, and why a flat network is a bad idea | 8 VLANs on one trunk, router-on-a-stick |
| Firewall & rules | deny by default, small named exceptions, rule order, and reading logs when something breaks | OPNsense, one pinhole per service |
| Virtualization | VMs vs. containers, storage, resource planning, and moving workloads around | Proxmox on the MS-01, 18 guests |
| Security | SSO, TLS and certificates, IDS/IPS, SIEM, and patching as a routine instead of a panic | Authentik, internal CA, Suricata, Wazuh, PatchMon |
| Monitoring & maintenance | knowing something is broken before anyone else does, backups, restore tests, and updates | Checkmk, Homarr, Proxmox Backup Server |
Every row in that table is a real job skill. You can read about all of it, but you really learn it when your own DNS goes down at 11 pm and you have to work out why.
What’s next
The custom DC-PDU. One cable out of the rack, for real this time.
Remote access with NetBird. A WireGuard-based mesh VPN with Authentik as the login, so my phone and laptop can reach the lab from anywhere without opening a single service to the internet. Access rules work per group, mirroring the VLAN design: admin devices get MGMT, everything else only sees the services behind Caddy.
A NAS with at least four bays. The STORAGE VLAN is already there and locked down, just waiting for it. Backups will then go 3-2-1: Proxmox Backup Server → NAS → offsite.
Frigate and cameras. An NVR with object detection, feeding Home Assistant. The cameras will get their own locked-down corner of the network, obviously.
A few Raspberry Pi Zeros. Two or three Pi Zero 2 W boards will join the rack for small side projects. The DC-PDU plan already has 5 V outputs reserved for them.
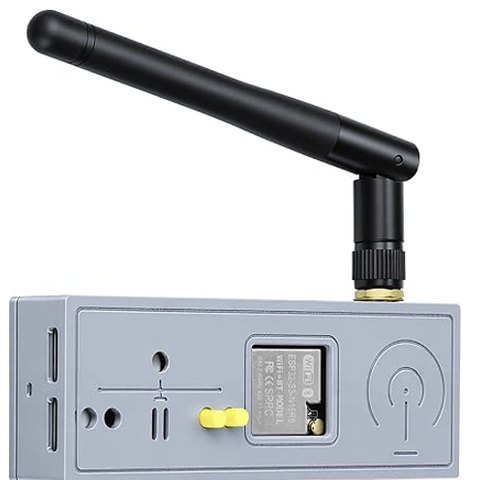
WiFi sensing with RuView, the topic of my next post. RuView uses the WiFi signals already in a room (CSI) to detect presence, count people and even estimate breathing, with no cameras at all. It needs a few ESP32-S3 boards as sensor nodes, and the hardware is already ordered: four ESP32-S3 DevKitC-1 boards in cases, plus small USB chargers and short USB-C cables so each node can sit wherever it works best in the room. It also talks to Home Assistant, so it fits right into this setup. Stay tuned.
The ESP32-S3 DevKitC-1, bare and in its case with the external antenna (product shots).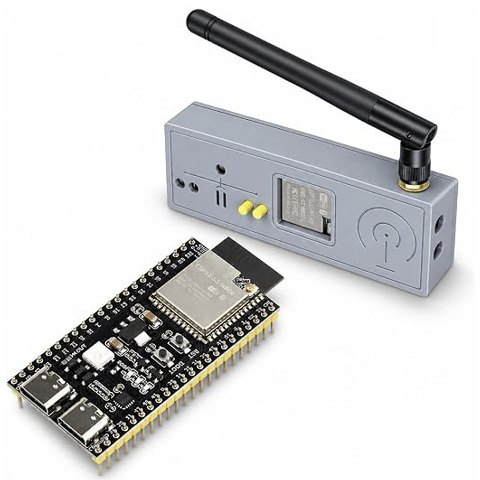
Lights on
That’s the whole thing. One rack, two hypervisors, eight VLANs, eighteen services, and a pile of power bricks I can’t wait to get rid of. If you’re thinking about building your own: start small, segment your network from day one, and plan the power before you buy the rack. Trust me on that one.
See you in the next one :)
